Monthly Archives: February 2012

Edible Landscaping Suppliers

I was just talking to my brother and realized I should share good internet sources for edible landscaping plants.  He has a lot to do with his 10 acres and is able to explore some areas of farming that I can’t so it’s interesting to bounce ideas off one another.  He expressed a concern to me that he wants to plant 50 fruit trees in bioswales and the cost is prohibitive at $20 per plant.  There are many good sources of edible trees and shrubs out there online some with considerably better prices than that.  I recommended Sandusky Valley for what he is planning to do at $3-5 per plant it would be a much more reasonable endeavor.

Sandusky Valley Nursery

American Hazelnut

This is my main standby.  Basically you get a rooted cutting from these people, but they are healthy and good plants.  You have to be patient though.  With plants this small it will be a few years at least until you see fruit or nuts.  The cost can’t be beat though.  If I were to open a retail location for edibles, I would probably order my stock here to pot up for the nursery.   One of the main advantages of this site is they occasionally have the super dwarf cherries and they have hazelnuts in two varieties.  Both of these plants are good choices for limited space.  The hazelnuts do take up some space, but if you want nuts in a limited space, they are the way to go.  Most nuts are giant trees.  Other neat plants I’ve picked up here and are doing well in my yard are guomi, aronia berry, prinsepia berry, and lycopene berry.

If you are looking to increase the output of your yard, edible landscaping is the way to go.  One of my favorite and most attractive hedges is made up of black currant bushes.  They are very attractive.  Many others can provide an aesthetically appealing look for your yard as well.  There are some Korean sour cherries that only get about three feet high and yield heavily.  Vines can provide kiwi, grapes, hops, chocolate fruit, and any number of other things.  The possibilities are limitless.  With the prices that Sandusky Valley offers, it doesn’t cost much at all to experiment.  You can start with just a few plants put in here and there for around $20.

The Arbor Day Foundation

This may be cheaper or the second cheapest source depending upon what you

want to buy.  I never think of the Arbor Day Foundation as a plant source and forget about it a lot.  If you join you get some free trees and I like the organization.  The fruit trees are about half the cost of normal trees on the market and the money goes for a good cause.  I have planted other trees from this source, but never any fruit trees so I’m not sure what their quality is.

Stark Bros.

I can’t say enough good things about Stark Bros.  They are local to St. Louis.  Customer service is one of their specialties.  They replace plants promptly and are not terribly particular about why the plant died.  These are the best quality plants I’ve ever gotten and they have a decent selection.  If you have never had a Candycrisp apple, you are missing out.  Candycrisp are AMAZING and better than any candy honestly.  I could eat them UP!  I got 6 or 8 off my tree last year and it was the second year I had it in the ground.  Crossing my fingers for a better harvest this year.  I can also recommend the Sweetheart Apricot from here.  Delicious and heavy yielding.  I lost mine last year to some crazy beetle that ate through the trunk, so I’m going to wait a few years and replant it.  Very fair pricing.  Quality healthy stock.

Edible Landscaping Online

I like this company.  They have some random odds and ends of the possible fruit world.  I picked up my medlar trees from them.  They have an excellent catalog.  It is a beautiful thing and I love getting it in the mail.  Their customer service is not so good.  When I have dealt with them, they have been terse and unwilling to replace dead plants.  Because they offer what they offer, I’m willing to deal with that on the rare occasion that it is needed.  Prices are a little higher than most, but they have rare plants.  This is one of the sites I used to plan the landscaping in my yard.

One Green World

The mecca of edible landscaping has to be One Green World.  These people have the oddest and most amazing things.  They also have an amazing catalog that is well worth getting.  It will get you in trouble though.  Lingonberries, low growing raspberries, medlars, and all sorts of berries I’m sure you’ve never heard of.  I think I got my honey berries from this source.  This is a fantasy wonderland of landscaping ideas for me.  Again the prices are higher, but the plants are very healthy and the selection is unmatched anywhere else.

How long does it take to dig a garden bed?

Today I decided to time how long it takes me to do this.  A lot of people tell me they just don’t have time to garden.  This is a 4 x 20′ garden bed.  I have fibromyalgia and have to be careful not to over do things or I pay big time.  Because of that, when I am digging new beds, I try to dig one foot down the first day and dig the second layer down the next.  This way I end up with good double dug beds.  I only have to do this when opening up new ground, after the first time, it is just a matter of maintaining and cultivating (oh, and don’t walk on the beds).  So…

One pass on one 4 x 20′ bed with one shovel is…… one hour and 15 minutes.

This is with picking out bricks and rocks and pottery and bottles.  Also figure in time for occasional day dreaming.  I think an hour would be a reasonable amount of time to figure in if you don’t have hard clay soil or brush.  I will let that air for a couple of days, then go back and do the next pass.  The next pass on this particular ground will have a lot more bricks and building debris in it than the first pass, so it will probably take me two hours.  When I am done, it will look like the bed on the right and be ready for a layer of straw mulch.

Elk Curry Stroganoff

Last weekend we also had door knock dinner at my Mom’s house.   She lives next door to my brother so we went over there for lunch.  I’ve been having issues with gout and told her ahead of time I really wasn’t interested in eating ham or lunch meat which are her default company foods.  Stupid genetics.  Anyway, she had some elk in the freezer she had gotten from my Godfather and I’m not going to turn down elk if I have a chance to eat it.  It’s too delicious.  Mom isn’t feeling great right now and wanted to make stew.  I could tell she wasn’t really feeling up to cooking so I decided to help out.  This is what we came up with.

Elk Curry Stroganoff

  • 3 TBS vegetable oil
  • 1 lb elk stew meat
  • salt and pepper
  • 1/2 C flour
  • 1 TBS garlic powder
  • 1 onion chopped
  • 3 Carrots chopped
  • 3 stalks celery sliced
  • 1 Qt apple juice
  • 2 TBS flour
  • 3 medium potatoes, chopped
  • 1/2 C dried shitake mushrooms
  • 1 TBS curry powder
  • 2 tsp tumeric
  • 2 tsp thyme
  • 8 oz cream cheese cut up
  • 1 package Kluski noodles

Season elk with salt and pepper and dredge in flour.  In hot oil, brown elk with garlic powder.  Push to side of pan and add onions, carrots, and celery.  Saute until soft.  Add 2 TBS flour and mix elk and vegetables together.  Gradually add apple juice and deglaze pan.  Add potatoes, mushrooms, curry powder, turmeric, and thyme and bring to a boil, reduce to simmer to thicken apx. 20 min.  Meanwhile, in separate pan boil water for noodles.  Cook noodles according to package direction.  When elk mixture has thickened and potatoes are soft, add cut up cream cheese to melt.  Remove from heat, but keep warm while noodles finish up.  Salt and pepper to taste. Drain the noodles.  Serve elk in sauce over noodles.

*One word of warning:  Some of my Mom’s spices are over 30 years old, so if using fresh spices you might want to take it easy on them since they will have retained more of their flavor!*

We fed 12 people with this, but I could have eaten a lot more.  Even the kids willing ate this for the most part.  My nephew went back for seconds.  It is fairly sweet just to be warned.  My first thought was to put sour cream instead of the cream cheese, but Mom didn’t have any so I thought this was a perfectly good substitute.  My folks live to far from any grocery stores to run out for ingredients like that.  I loved this dish and so did my Mom.  She’s a pretty picky eater so I was doubly happy with the way it turned out.

Sorry about the back log of posts today.  I needed to get caught up with what I had put together this week.  It’s getting to be the busy time of the year for gardening and I don’t want to have to leave stuff out in the coming weeks.

Dwarf Iris – First Flower of the Year

Iris Cristata

Species Native to Missouri

3-6″ Tall

Each year I anxiously look forward to this flower.  I adore it’s bold appearance in my garden and know that it means soon I will be gearing up to plant my garden.  I think I picked this up at Lowe’s on the clearance rack years ago and planted it because it was a native plant.  I’ve been really impressed with this plant.  It doesn’t spread much, but I have it planted in a terrible location.  I have a trouble area of landscaping in the front near a Silver Maple.  Because St. Louis city yards are often quite small, the tree sucks up all the available water on our side of the street.  When the garden peaks in early summer you can see the further from the tree it gets, the taller and more lush it is.

This year when it is done blooming I am going to move it to the berry garden.  It’s a woodland plant naturally, and I think it will do well with the partial sun plants.  Soon the holly next to it will overwhelm it so it is time.

On a side note, the 2nd annual St. Louis Sustainable Backyard Tour is gearing up to take applications for hosts.  It is being held on June 24th, 2012.  If you are interested in more information and a link to an application, please drop me a note at jacquelyne@sew4cons.com.  Hopefully soon we will solidify more information and I can post a link.  Last year’s tour was a great time and I met a ton of wonderful people, if you use sustainable practices in your back yard, please consider participating.

Sustainable Seedling Flats

Another week and it’s time to start some seedlings assuming I can find enough plastic bottles for my greenhouse.  I may have to skin it in sheet plastic for this season.

So, last weekend I went home to my family farm and worked on seedling flats with my brother.   I was thinking we could rip up some pallets and decide the sizes from the wood we had available.  My brother, in his overachieving way had other ideas.  He had some pine he had just made into boards on his saw mill stored away in the old hog house.  They were out there drying out so we grabbed four of them, threw them on the wagon and went back to the main house where his workshop is.

He asked me what sizes they should be.  That’s a fairly good question.  I somehow feel the need to just make wood into things and not worry about measurements so much.  I thought well about the size I want to carry I guess.  I looked it up in Rodale to see if there was a recommended size, but all I could find were scribble notes my three year old apparently needed to put in there.  The one thing I do know is you need to leave cracks in the bottom for water to get out.  Stuff the cracks with something permeable like sphagnum moss or coffee filters before you put dirt in.

OK, so we decided on a size and set to work.  We decided to make them twice as long as they are wide.  We cut a bunch of long boards and short boards.  We had planned to make a ton more than we ended up making, but there are things to do an distractions to be had.  One major problem was a grain wagon that had a stuck axle.  So my husband and my dad worked on the axle and my brother and I started in on the boxes.

We made the frame by nailing the long pieces on the outside of the short pieces.  Next, we took a few long pieces and cut them down the center and nailed them to the bottom leaving 1/8 to 1/4 inch gap between each piece.  Then we took one of the long newly narrow pieces and cut it in half and nailed it to the ends for handles.  We discussed routing in dents for grips, but we decided not to get any more tools out.  I think that would be a good choice if you want to take the time to make nice boxes.  The cut pieces work pretty great too.

Here is one without handles on it:

From the back, and the completed pile!

Now, we stopped here.  The wood was just too green yet.  I don’t know how long they will last, but considering the wood was harvested and milled without transport I’m pretty happy with them.  I don’t have to carry them very far either.  Hopefully I can keep them in working condition for a few years.  It’s also nice to have trees from home.  They are pretty rustic, but I’m very happy with them.    I think my brother is going to use some pallets he has laying around to make his.  Hopefully, I can get up there to help him with them.  He ended up not keeping any out of the day.

If you would like something a little more concrete measurement wise, I put this together:

So good luck on getting together your flats.  Plastic flats tear easily and don’t break down, please consider using something a little easier on the environment.  There are plenty of sources of scrap lumber out there.   Avoid plywood and particleboard though.

Mexican Quiche or what to do with a surplus of eggs

Once in a while we get behind on egg eating.  It’s a wonderful problem to have.  This was our solution last night, I can’t wait to eat all the leftovers!

Mexican Quiche

  • 8 slices bacon, browned and chopped
  • 1/2 C flour
  • 1 tsp baking powder
  • 1 tsp salt
  • 1 TBS chili powder
  • 2 tsp ground cumin
  • 12 eggs
  • 8 oz cheddar cheese shredded
  • 4 oz feta
  • 4 oz can green chili sauce
  • 1 lb chopped greens such as spinach, chopped
  • 8 oz broccoli chopped
  • 1 TBS garlic powder
  • 1/2 C butter
  • 2 pie crusts
  1. Preheat oven to 400 degrees fahrenheit. Prepare two pie pans with prepared crusts.
  2. Whisk flour, baking powder, salt, chili powder, and cumin in bowl.
  3. In seperate bowl, beat the eggs until smooth.  Whisk in the flour mixture until smooth.  Add the cheddar and feta, green chili sauce, and chopped greens until mixed thoroughly.
  4. In skillet, saute broccoli in bacon grease, After one minute add garlic powder and stick of butter.  When broccoli brightens, add mixture to eggs and mix thoroughly.
  5. Pour into prepared pie crusts.
  6. Bake for 15 minutes at 400 degrees then reduce heat to 350 degrees.  Continue baking until lightly browned about 35 to 40 minutes.

Chickens Won’t Walk in the Snow

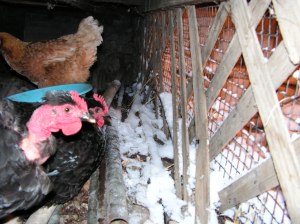
We’ve had our first real snow of the season here in south St. Louis.  The chickens are not pleased.

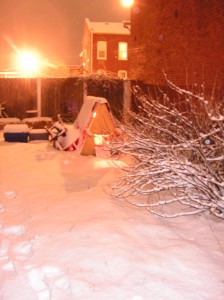
The backyard covered in snow.One of the big problems for them is that it never really gets dark here when there is snow on the ground.  Three of my chickens are retired layers from a farm.  The first two nights they were here they totally freaked out about going to bed.  It’s not quiet here, it’s not dark.

It’s really a beautiful snow, I have no idea why the chickens won’t walk out in it.  This is a problem.  The other thing about cities is they are stocked with predators.  Dr. Trivia’s 500 cats are not going to let a night go without checking to see if I put the chickens away.  Normally in the evening I just have a seat and wait until they all decide to mill about and into bed.  Generally by 8 o’clock they have all headed into the coop and I can close the pop hole and get back inside.  I can’t even sit them out, my chair is covered in snow.

This seemed like an ideal time to use the evil dog for good.  He loves to chase the chickens so I went to send him under the porch where I can hear them (not the wisest of all plans) fortunately I forgot that I moved the rain barrel closer to the back stairs so no dogs can get under there.  It would have been a bad plan.

I can’t find a flashlight so I grab the camera and head out to see if I can find them.  Today was pork liver keep away sporting day for the chickens, so they’ve had a great day trying to tackle each other in their little selfish ways.  They were still tackling each other when the snow started up so they rushed under the porch on the way back to the coop and apparently sat down.

I found “little red hen” first.  She want’s to go to the coop and just can’t quite summon up the courage to go.  I have left these unpatched holes under the porch this spring because I thought it might provide some cover when the chickens need to escape.  I had a raptor get one about a month or two ago.  I thought there were enough shrubs in the yard, but no.  So we have this weirdly patchy double thing going on and a water barrel so I am not at all ever going to get under this porch tonight.  To the left the grates are covered in grape and kiwi vines as well.  Sigh.

So where are the rest of the girls?  Perching on metal pipes under the porch.  Jeez.  Metal?  Really ladies?  You won’t walk 10 feet in the snow, but standing on metal seems fun?  I can’t get them out.  Gigantor the Possom that lives in the abandonded building across the street, or the 500 cats, or the raptor that hunts at dawn are going to swoop them up in the morning because they are not smart little creatures.

Look at this warm and inviting coop!  It’s got a tarp, a heat lamp, plenty of wind blocks.  It’s nestled all nicely on the north side of my neighbors house.  You would think one of them would be brave and go.

Sigh.

So, there is some good that comes from the snow.  I can see how effectively my compost pile it working.  The answer is, it’s just not.  I will need to give it some attention in the next couple of days in an effort to get it doing what it needs to do again.  Do you know how I can tell?  There is snow on it.  It’s not warm at all.  Thinner snow than the rest of the yard, but not by much.  This is my cheater pile of last year’s debris waiting to be spread out in spring hopefully after it has broken down.  Hauling it to continue breaking down does not seem optimal.

This picture shows pretty accurately how bright it is out there.  Will I have any chickens tomorrow?  I go to bed with a queasy stomach thinking about it.

Taiwan Spinach

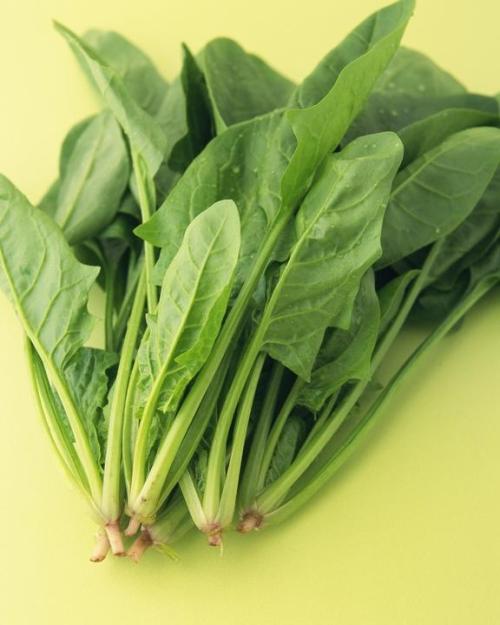
This week at the international grocery store they had Taiwan spinach.  I love this green!  I lack the vocabulary to describe why it meshes so well with my taste buds.  I was first introduced to it at a Sunday morning dim sum located in University City.  Oh, Lu Lu, how I love your food.  Lu Lu Seafood Restaurant makes some killer dim sum.  (And they are one of the few places with bubble tea in town.)  The ladies come around with the carts instead of a weird buffet thing like many of the restaurants here in the St. Louis area.  You never know what is going to come around and be available which is half the fun.  The particular dish that introduced me to this green involved steaming the spinach and dressing it with a soy sauce/ sesame oil mixture.  Fantastic!

Amaranthus gangeticus (Chinese spinach or taiwan spinach)

This edible amaranth grows about 14 inches high, but can be higher when flowering.  The seeds and greens are edible, but the flowers are not.  This is a warm weather crop.  Seeds should be germinated in the dark (with a row cover) at about 50 degrees fahrenheit.  These plants will not stand frost or freezing.  This green likes loose, sandy, and fertile soil.  It can’t stand compacted soil so a good cover of straw or frequent hoeing will help it’s growth.

3 Ways to Harvest (about 6-8 weeks):

  1.  Pinch tips and let regrow.
  2. Pull out whole plant when it reaches about 10 inches.
  3. Cut plant back to about an inch an a half above the ground to regrow.

This plant can put out a pretty hefty harvest apparently with proper thinning or cutting back.

I like this variety of edible amaranth probably best of all I have tried.  It has a really satisfying and hearty taste.  It also lacks the bitterness of some of the red tinged cultivars.  So here is what we ate tonight (I had no idea what call it):

Chinese Spinach and Mushroom Grits Bake

  • 1 1/2 Cups Grits
  • 5 TBS oil
  • 1 C diced onion
  • 2 leeks, finely chopped
  • one large king oyster mushroom (half pound)
  • 2 TBS dry sherry
  • 1 lb Chinese spinach, washed and chopped
  • 3 garlic cloves, crushed
  • 10 fresh Thai basil leaves, chopped
  • 1 lb firm tofu, rinsed and patted dry
  • 2 TBS lemon juice
  • 2 TBS Pinoy Curat Spiced Coconut Vinegar
  • 2 tsp sriracha sauce (cock sauce)
  • 1 TBS Chinese 5 Spice
  • 2 TBS Dark soy sauce with mushroom flavor
  1. Preheat oven to 350 degrees.
  2. Cook Grits according to directions and set aside.
  3. Heat 2 TBS oil in large pan.
  4. Add the onions, leeks, and mushrooms and cook over medium heat until the vegetables are caramelized. Set aside.
  5. De glaze the pan with the sherry, add the salt and cook until dry.
  6. Add the spinach and cook until wilted.
  7. In a separate skillet, heat remaining oil.
  8. Add the garlic and basil.  Simmer until garlic is golden brown.
  9. In food processor, add contents of skillet, tofu, lemon juice, Pinoy Curat, sriracha, Chinese 5 spice, and soy sauce.  Blend until smooth.
  10. Add tofu mixture to vegetable mixture.
  11. In large casserole, layer half of the grits on the bottom.  Gently smooth vegetable mixture on top of grits.  Top with remaining grits as completely as possible.
  12. Bake at 350 degrees for 30 minutes.
  13. When baking is complete, turn off oven, crack open and let rest in oven to cool for 10 minutes.  Serve.

Now that gardening season is creeping ever closer, consider giving this vegetable a try.  So good.  Why not make a spot in your garden for some new and unusual greens this summer?

Seed Sources:

Evergreen Seeds

Kitazawa Seed Co.

and my favorite local seed company:  Baker Creek Heirloom Seeds


Turkens

I am a total fan of turkens.  I’ve never had a bad one.  This breed is ugly, but seemingly perfect for urban agriculture.  They tolerate confinement, eat very little, can’t fly, and are very friendly.

turken girl

This year I have had Red Star, White Rock, Red Rock, Black Aurucana, one silver lace wyandotte bantam and Saipan Jungle Fowl in addition to turkens of many colors.

Today my partner in garden inspiration, Heather and I ordered our chicks for this year.  I think the plan we just came up with is 8 turkens, 3 white rocks, 5 red caps, 3 feather footed for the neighbor, 3 lakenvelters, and 3 black minorcas.  The second coop is open and I’m not sure when the delivery date will be.  I have to think about where I want to put it while they are growing, it’s more appropriately called a chicken tractor.  I may have time to do some renovations, may not.

The turkens lay daily never skipping a day.  They start out with fairly large eggs and within a week or two are regularly laying large grade eggs.  I’ve had really good luck with White Rocks and the Aurucanas as well.  Good reliable layers.

I won’t be able to tell the difference in feed with this batch since I’m putting them all together.  I know from past experience however that the Turkens eat far less than other breeds.  Very cost effective and they make good meat as well.  Excellent dual purpose breed and a joy to own.

The Garden Plan

Insert ominous music here….

So, last year I ran out of things to do outside in my yard.  Very depressing.  Of course that means this year I must have grand plans that may not be attainable.  The lot across the street is one that will test my resolve.  If I can do the 16 beds, I should be able to grow a complete potato heavy diet for four.  I also need to dig a bed or two for my nice neighbors to garden in as well.  They have no sun thanks to a gorgeous linden tree that occupies the whole of their tiny back yard and a strange deck built by an obnoxious bohunk previous owner that overlooks my six foot privacy fence.  Fortunately since the bohunk abandoned the city for renecky parts unknown I have had awesome neighbors in that house and don’t mind the deck anymore.

the lot from the south

Anyway a refresher on the lot (from another angle because I know you can’t remember from my blog entry I made an hour ago, lol).  So, I have some reservations about working over here.  As I said before, there used to be multifamily structures over here.  Those structures almost certainly had basements.  All the houses in my neighborhood have basements.  There are two holes about where I am standing to take this picture that the neighbor has been throwing sod into.  I will continue to throw sod.  What concerns me more is the sunken area at

the sunken spot

the back.  Fortunately I have no intention of building anything and I don’t think I will fall into the ground, but the difference in rain runoff and weight might affect the lay of the land and cause me some problems.  Right now the sunken area is limited to a spot in the back which is easy enough to deal with.  I need a good rainstorm though to see how the water in this area works.

My Mad Plan

So I have mad cad skills and decided one night to work out the garden plan in cad.  Pretty easy to do actually. They lack a polished look and have spelling errors I have to admit.  Across the street is heavily based on the four family garden from How to Grow More Vegetables buy it, it’s awesome.  I think there is a new version than the one on that link however.  Go visit the Ecology Action people they are the same folks and have years of experience with biointensive gardening.

Spring/Summer Side Yard

Summer/Fall Side Yard

So the mad plan is based on my wish list worked into 4 x 20 foot beds.  After laying things out across the street, I have found that up to four more can be put in.  I left one for the neighbors but really they could have up to five.  Two I would be hesitant to put in until we understand the underground nutso stuff going on over there.  I have to guess that the sinkhole is part of a basement that wasn’t bulldozed full.  The rest of the basements should still be under there.  I may check city hall for old building specs for that site.    Theoretically this will also impact drainage on the site, should be a fun year.  Until recently my side yard leaked oddly into my basement, but I think whatever the passageway was has filled in with sediment at this point.  That garden is also on an old building site.

Another note should be that I plan to freeze, can, and root cellar much of the harvest.  There are ways to plant to extend harvesting and some of that will happen, but mainly it works better for my brain to have things ripen at the same time.  I’m not market gardening which also impacts how to plan.

This does not negate my need to use other sites for gardening.  Winter Squash, Summer Squash, Cucumbers, and Gourds cannot be grown in more than one variety within half a mile of each other or they will cross pollinate.  I have three other yards I will be placing varieties of those in this summer as well. (Also, after the Thai Bottle Gourd fiasco, I’m not really allowed to have gourds in the side yard again, lol.  I don’t recommend Thai Bottle Gourds for urban gardening.)  Probably also grow some other herbs and peppers there as well.  I think peppers just need 10 feet, but the ant population on my lot make peppers difficult to grow.  I had much better luck last year.  Previous years have had too much insect damage.